How to DIY customized sublimated coated mugs?

Today, we demonstrate the procedure for applying a dye sublimation transfer to create a personalized sublimated mug. The transfer is created using a normal inkjet printer and Sub sublimation inks on Sublimation Printing Paper.


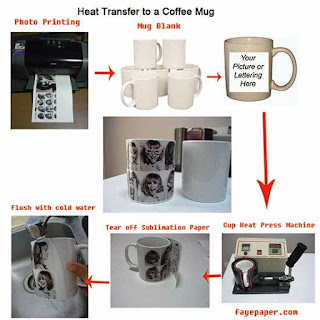 Once you are happy with the position of you logo / logos you are ready to print your artwork. Generally for most good quality A4 sublimation paper you don't require a lot of ink to be laid down on the sublimation paper. If you are using an EPSON printer good setting to start with are Quality Option: Photo, Paper Type: PLAIN PAPERS, under the Page Layout Tab make sure the Mirror Image check-box is ticked. Click OK then the Print Button and then the Print button again in the Illustrator Print window.
 Now adjust your pressure setting on your mug press so that when you clap your mug in the press it have medium to heavy pressure on it. You can tell if you have enough pressure as the Teflon and silicone rubber backing of the mug press will bow around the top and bottom of the mug a bit.
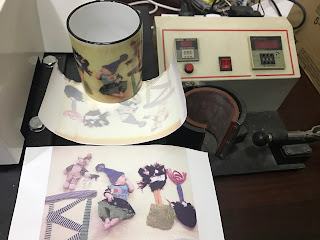
Now plug in your mug press and set the temperature for 400F / 204C and the timer for 180 seconds and let it preheat to the required temperature. (please note this is the setting for sublimation papers may require lower temperatures or longer or shorter heating times.Once the press reaches the set temperature slide you mug into position and clap the mug press shut. If you have one with a count down timer it should start automatically or you may have to press the enter button to start the timer.

More info:
Website:www.skyimagepaper.com
Company Name: Fei Yue Paper Industrial Co.,LTD
E-mail: sales@feiyuepaper.com
Tel: 86-025-83228884
Whatsapp: +86 18252072197
Address: Central Road 323, Nanjing, Jiangsu, China


评论
发表评论